Arduino Running LED Light with 74HC595 and Potentiometer Speed
Level 45 · Running Lights · 30 minutes
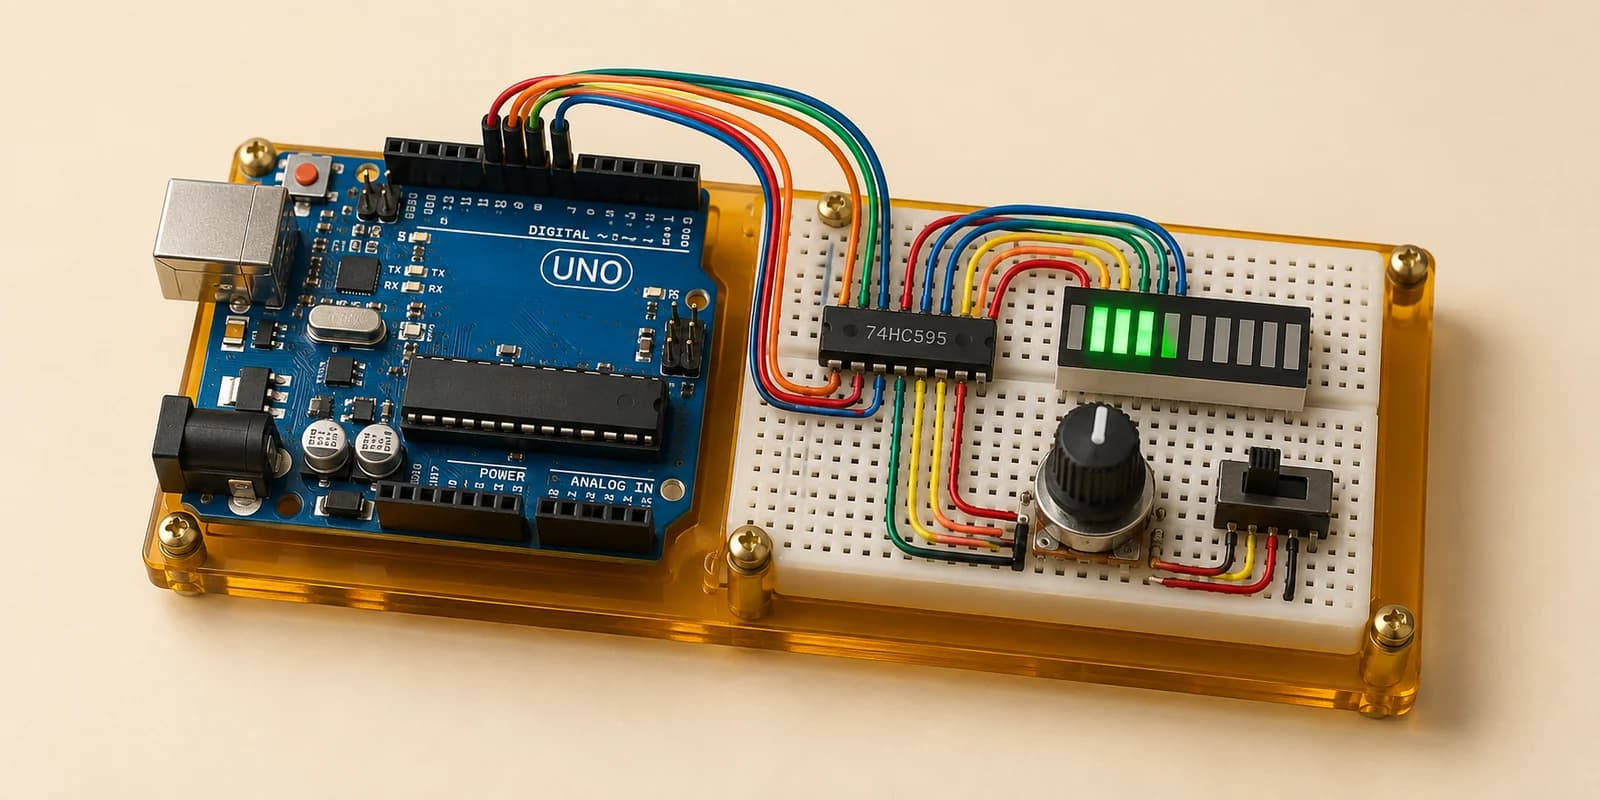
A light runs along the bar graph through a shift register. A knob sets the speed, a switch the direction.
Preview the project free; a course seat is required to run and submit. No hardware kit needed.
Your project challenge
Make a light run along the bar graph. Wire it up: - 74HC595: VCC 5V, GND GND, OE GND, SRCLR 5V, SER D11, SRCLK D12, RCLK D8 - QA-QH to A1-A8, C1-C8 to GND - Knob: GND, 5V, middle to A0 - Switch: pin 1 GND, pin 3 5V, middle to D2 Knob sets speed. Switch sets direction.
Components you’ll use
- Arduino Uno
- 74HC595 Shift Register
- LED Bar Graph (10 segments)
- Potentiometer
- Slide Switch
What you’ll build
Running lights, like the ones on a shop sign. One light runs along the bar graph. A knob sets its speed and a switch sets its direction.
How it works
- The 74HC595 turns three Arduino pins into eight outputs.
shiftOut()sends a byte to it, one bit at a time. - A pulse on the latch pin (RCLK) shows the byte on QA to QH together. Bit 0 is LED 1, at the bottom.
- LEDs 9 and 10 are not wired. The chip has only eight outputs.
The key idea
Show a byte with one bit set, wait, then move the bit one place. After LED 8 comes LED 1 again.
Read the knob and the switch every step. Knob left: about 400 ms a step. Knob right: about 50 ms. Switch HIGH: run up. Switch LOW: run down.
⚠ Watch out
Forget the latch pulse and nothing lights, even though every bit went in. Move the light one place at a time. A jump or a flash is not running.
The interactive editor includes the wiring guide, code editor and simulation controls.