Arduino Potentiometer and PWM LED Brightness
Level 5 · Level 5 — Between 0 and 1 · 30 minutes
An auto night lamp: brightness tracks the room, the pot sets the threshold.
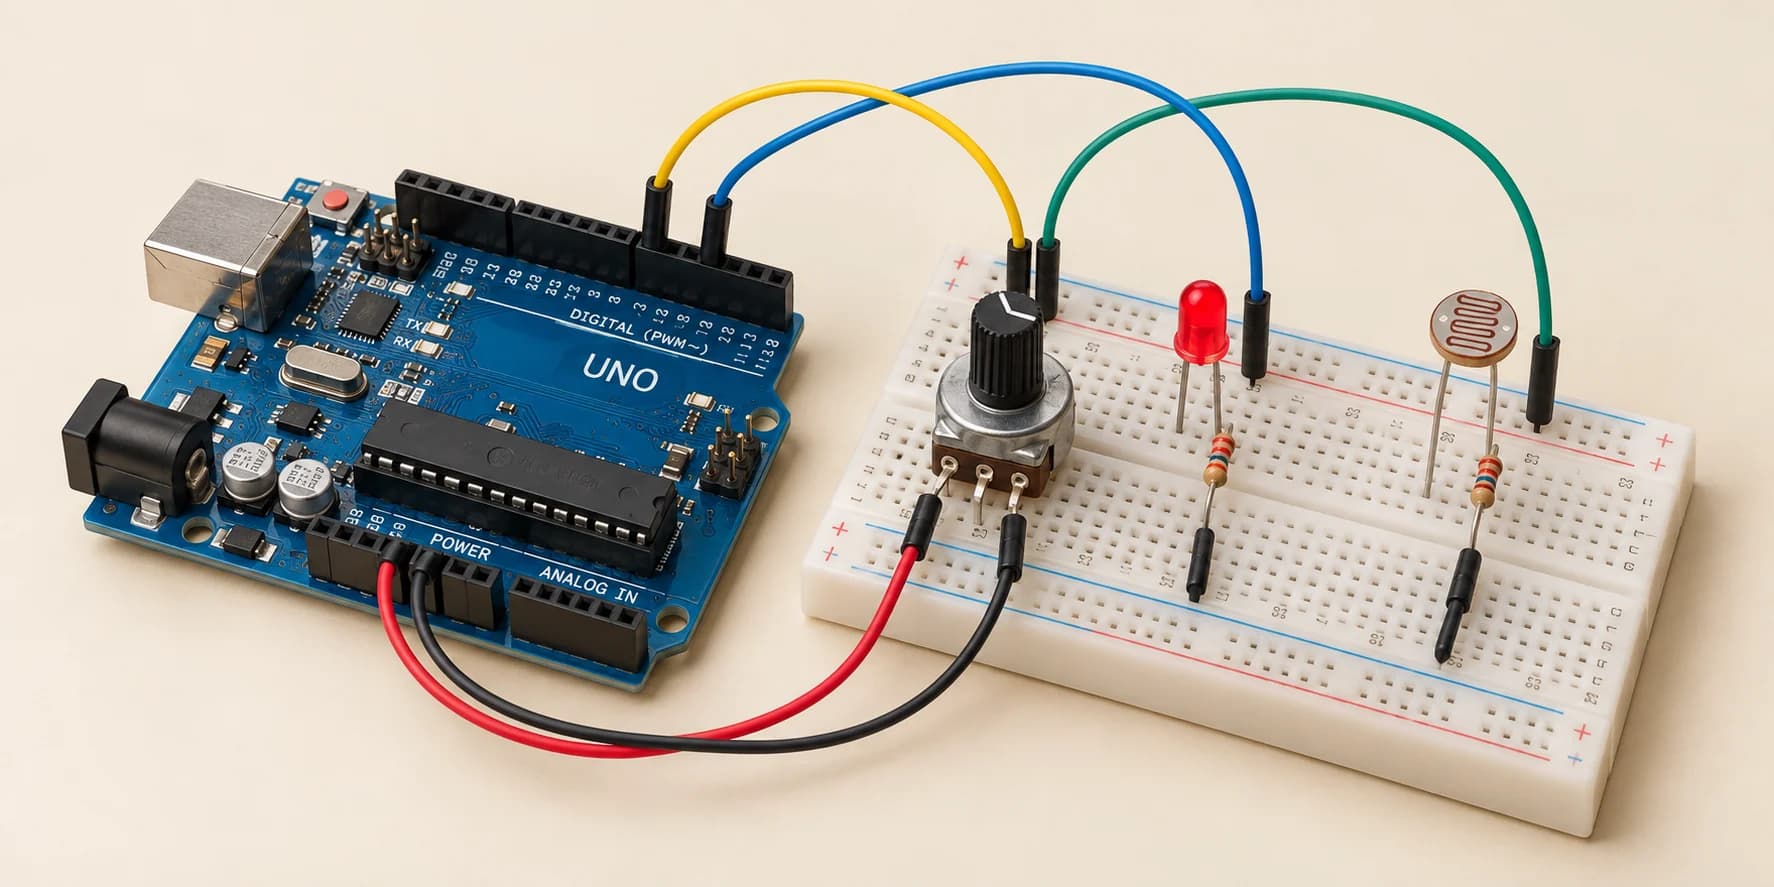
Preview the project free; a course seat is required to run and submit. No hardware kit needed.
Your project challenge
Build an automatic night lamp. Dark room, bright LED. Wire it up: - LED: anode to D9, cathode to GND - Potentiometer: outer legs to 5V and GND, middle leg to A0 - LDR: outer legs to 5V and GND, middle leg to A1 Each middle leg carries the reading. Swap A0 and A1 and the lamp runs backwards. Then compile.
Components you’ll use
- Arduino Uno
- LED (Light-Emitting Diode)
- Potentiometer
- LDR (Light-Dependent Resistor)
What you'll build
An automatic night lamp. The darker the room, the brighter the LED.
How it works
- The LDR (a light sensor) on
A1follows the room's light. - The knob (a potentiometer) on
A0sets how dark counts as dark. Its middle leg is the wiper. - The LED sits on
D9, a PWM pin, so it can be half-lit. D13 cannot. - Darker than your threshold, the lamp fades up. Brighter, it goes out.
The key idea
Digital pins only ever know HIGH or LOW. Analog pins know everything in between.
analogRead() gives 0 to 1023.
210 = 1024 steps. 10 bits of resolution, real hardware, not a simulator shortcut. Half of 5V reads back as 512.
analogWrite() takes 0 to 255, and never makes a steady in-between voltage. It is a very fast digital signal, switching so quickly the LED only ever seems to dim.
⚠ Watch out
The knob and the LDR each hand you an identical middle leg. Swap them and your sketch reads the knob as the room. The lamp then sits dark in the dark, and glows at about half brightness in the light. Knob is A0. LDR is A1.
The interactive editor includes the wiring guide, code editor and simulation controls.