Arduino Servo Motor Control
Level 12 · Level 12 — Pointing · 25 minutes
A servo does not obey a voltage — it obeys the width of a pulse. One knob, one horn, and an angle you can command.
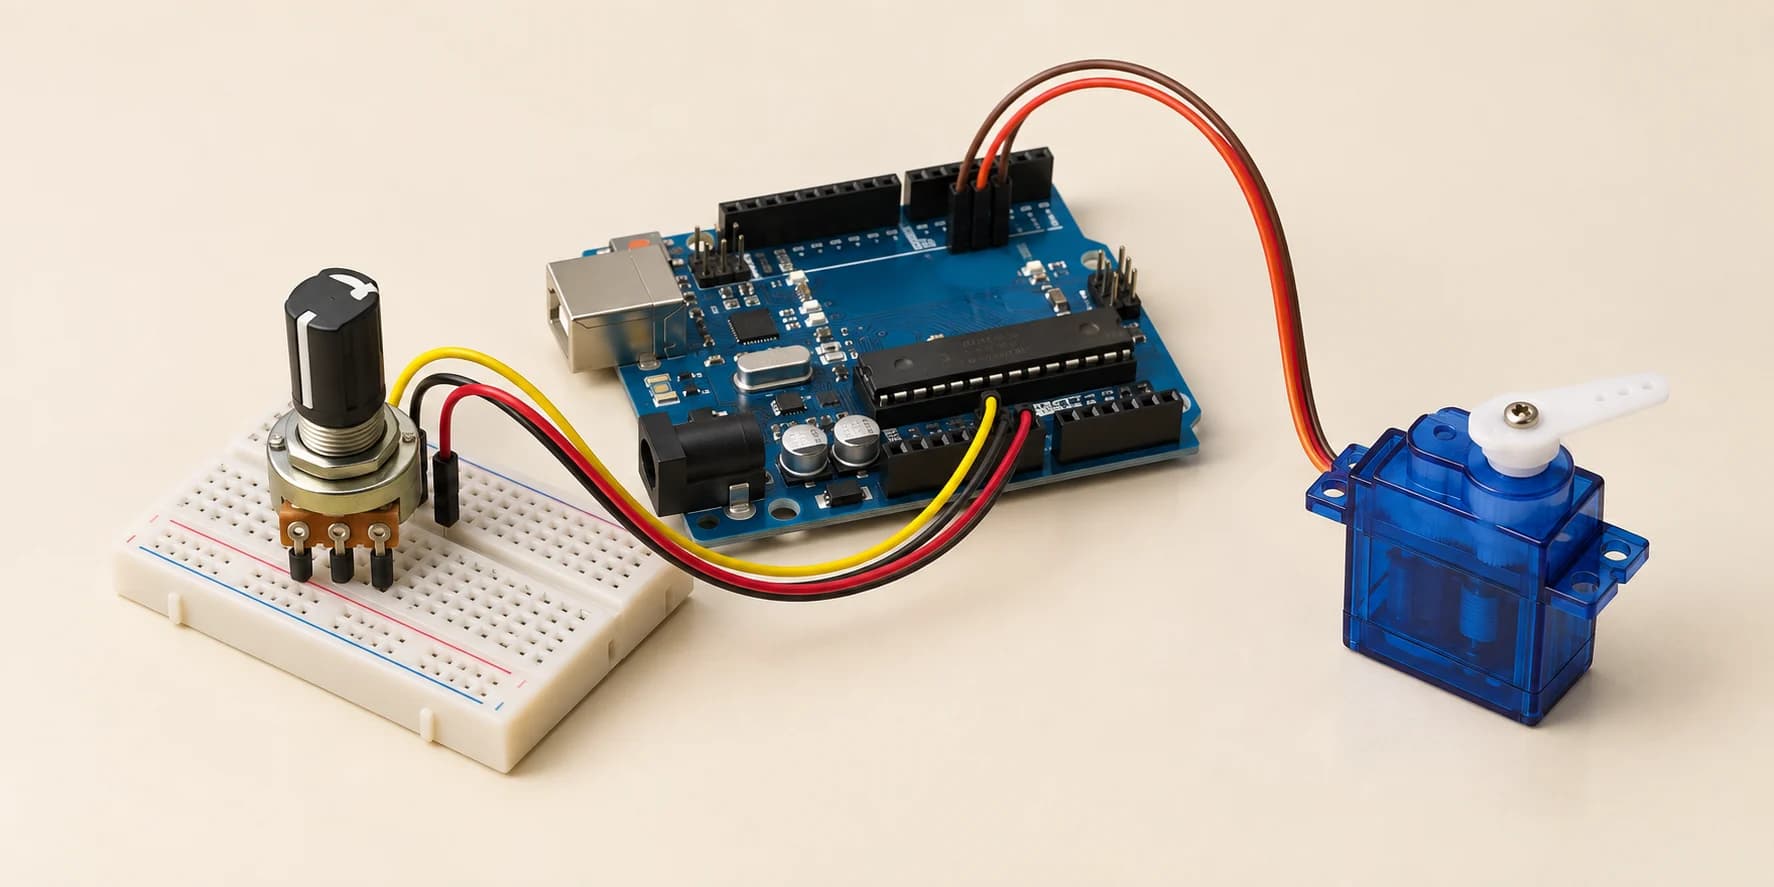
Preview the project free; a course seat is required to run and submit. No hardware kit needed.
Your project challenge
Make the knob aim the servo horn — the little arm on top. Wire it up: - Servo: signal to D9, red to 5V, brown to GND - Potentiometer: outer legs to 5V and GND, wiper to A0 Knob at one end points the horn at 0 degrees, the other end at 180. Print each angle as "Angle: 90".
Components you’ll use
- Arduino Uno
- SG90 Micro Servo
- Potentiometer
What you'll build
A knob that aims a servo horn — the little arm on top.
How it works
- A servo ignores voltage. It cares how LONG the signal wire is held high, about fifty times a second.
0.544 ms = 0 degrees,1.472 ms = 90,2.4 ms = 180. Everything between is spread evenly.- Servo.h times those pulses for you. Call
attach(9)once, thenwrite(angle).
The key idea
The knob on A0 reads 0 to 1023. The servo takes 0 to 180.
map(knob, 0, 1023, 0, 180) turns knob 1023 into angle 180.
There is no spring. An LED is only lit while you are lighting it, but a servo remembers where you sent it. The run ends with your knob back at the middle and the horn still sitting near 90.
⚠ Watch out
Most students reach for analogWrite(). It sets duty cycle, not width — 1 ms high every 20 ms = 5% duty, and a servo cannot read 5%. The horn still moves, just to the wrong angles. It never covers the full 0-to-180 sweep, so the sweep check fails while serial prints perfect numbers.
The interactive editor includes the wiring guide, code editor and simulation controls.