Arduino millis() Timing Without delay()
Level 2 · Level 2 — Time · 20 minutes
Beat a buzzer to a tempo without ever blocking the rest of your code.
Free to simulate. No hardware kit needed.
Your project challenge
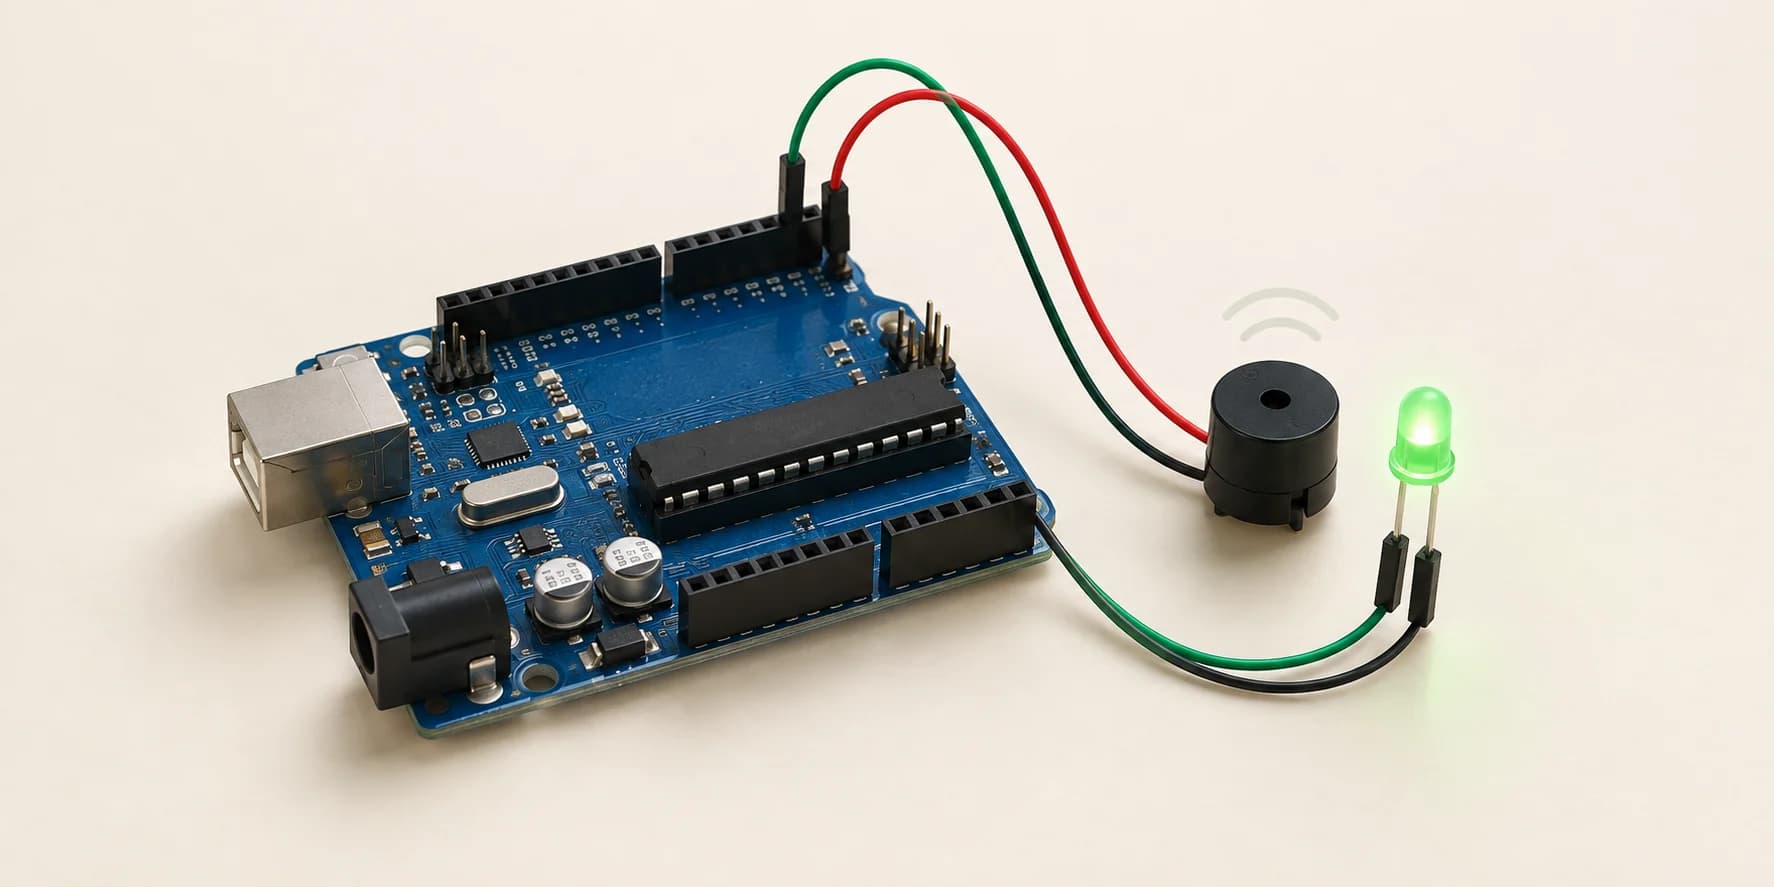
Make the buzzer beep slowly while the green LED blinks fast. The sketch is written. You only wire it. Wire it up: - Buzzer: pin 1 to D8, pin 2 to GND - LED: anode (long leg) to D13, cathode to GND Then compile. Pin 1 is the leg the sketch drives; pin 2 needs GND, or the buzzer stays silent.
Components you’ll use
- Arduino Uno
- Piezo Buzzer
- LED (Light-Emitting Diode)
What you'll build
Level 1's sketch blinked by telling the board exactly when to wait. What happens when you need two things happening at different speeds, at the same time?
A slow buzzer and a fast green heartbeat LED, from one loop().
How it works
- The sketch is written. The wiring is not.
- Each
loop()pass checksmillis()and acts only when enough time has passed. - The buzzer flips every 500 ms, the LED every 100 ms: five LED flips per buzzer flip.
The key idea
delay() is easy but dishonest. While it waits, your board can do nothing else at all. millis() just tells you what time it is, right now, without ever waiting.
The heartbeat is the proof: swap in delay() and it stalls too.
2500 ms run ÷ 100 ms = 25 flips. The grader wants 15.
⚠ Watch out
The buzzer's legs are not marked + and −, just numbered: black is pin 1, the leg the sketch drives; red is pin 2, which goes to GND. Swap them, or miss the GND wire, and the buzzer stays silent while the green LED blinks perfectly. A wiring bug, not a code bug.
The interactive editor includes the wiring guide, code editor and simulation controls.